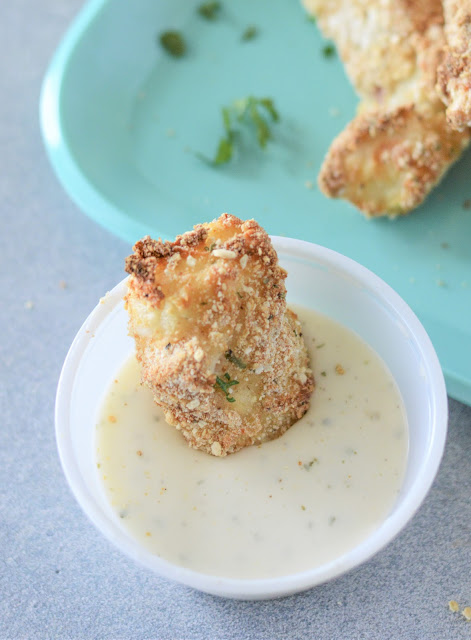
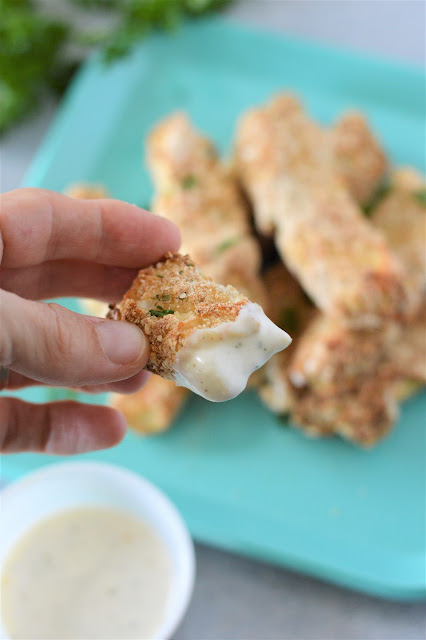
Skip the store bought version! These Air Fryer Fish Sticks are made from fresh or frozen cod and seasoned to perfection with garlic, paprika, and Italian breadcrumbs. Quick, easy, and family approved!
This post contains Amazon Affiliate links. Hot Eats and Cool Reads may receive a small commission for Amazon purchases made through these links at no cost to you. Thanks for your support!
Looking for more recipes, books, food and travel fun? Follow me!
Subscribe by Email, Facebook, Pinterest, Instagram and Facebook Recipe Group!
CLICK TO PIN THIS RECIPE FOR LATER
This post was last updated 7/2025.
Thanks so much for supporting a small business and visiting our family owned blog 💕
Shopping list:
- cod fillets
- eggs
- all purpose flour
- paprika
- salt
- garlic powder
- onion powder
- Italian style bread crumbs
- olive oil
Once you try these homemade fish sticks, you’ll never go back to store bought! They’re budget friendly, made with just a handful of simple ingredients, and always a hit with the kids.
We’ve cooked them in both the oven and the air fryer, and they turn out perfectly either way, though we usually lean on the air fryer for its ease and quick cleanup. The seasoned breadcrumb coating, with some simple spices, gives each bite a flavorful crunch that pairs so well with tender, flaky cod. You can easily swap in another white fish if that’s what you have on hand.
These fish sticks are ideal for busy weeknight dinners or a quick weekend lunch. Serve them with veggies and mac and cheese, over a fresh salad, or turn them into sandwiches with a swipe of tartar sauce for an extra treat.
Need some more easy air fryer fish recipes? Try my Air Fryer Salmon Bites or Air Fryer Catfish Nuggets!
Looking for some kid friendly sides to serve with these Fish Sticks? Check out this Bowtie Pasta Salad or Easy Shells and Cheese!
Keep scrolling for the full printable recipe 💙
Recipe tips and substitution ideas:
- These crispy fish sticks are delicious with classic tartar sauce, creamy ranch, or even a simple mix of ketchup and mayo for the kids. For a more flavorful twist, try them with garlic aioli, honey mustard, or spicy sriracha mayo. If you're craving something fresh and tangy, lemon dill yogurt sauce or cilantro lime dip are also fantastic choices.
- To store leftover fish sticks, place them in an airtight container and refrigerate for up to 3 days. To reheat, use the air fryer or oven for best results. Air fry at 375°F for 4–6 minutes or bake in a preheated oven at 400°F for 8–10 minutes, flipping once, until heated through and crispy again. Avoid microwaving if possible, as it can make the coating soggy.
- For longer storage, freeze them in a single layer on a baking sheet until solid, then transfer to a freezer safe bag or container for up to 2 months. Add 2-3 extra minutes to the cooking time, if using from frozen.
- Fresh or frozen cod can be used. Make sure to completely thaw frozen fish before using. Try cutting them into nuggets instead of strips.
- This recipe is super flexible, so feel free to switch things up based on what you have on hand or what your family loves. You can use any white fish you like, such as tilapia, haddock, or pollock. Use your favorite spice blends like Cajun, lemon pepper (always a favorite!), Italian seasoning, or even a smoky BBQ rub for a fun twist. Swap in panko breadcrumbs for extra crunch or try crushed cornflakes for a kid-friendly variation. You can even add grated Parmesan to the breadcrumb mixture for a cheesy boost!
- No air fryer? These can be oven baked instead. Preheat oven to 425°F. Prepare fish sticks as directed (coat in flour, egg, then seasoned breadcrumbs). Arrange fish sticks on the prepared baking sheet, leaving space between each piece. Lightly spray or brush the tops with olive oil. Bake for 12–15 minutes, flipping halfway through, until golden and crispy. Check that the internal temperature reaches 145°F.
Our favorite kitchen equipment and supplies used with this recipe:
- Ninja Air Fryer XL
- Set of 3 Breading Pans
- Oil Sprayer for Cooking
- OXO Good Grips 2-Piece Silicone Whisk Set

Air Fryer Fish Sticks
These homemade Air Fryer Fish Sticks are crispy on the outside, tender on the inside, and full of savory seasoning. Made with cod fillets and a simple breadcrumb coating, they’re a lighter, delicious twist on a classic favorite!
Ingredients
- 3 cod fillets (about 1 pound)
- 2 large eggs
- 1 cup all purpose flour
- 1 teaspoon paprika
- ½ teaspoon salt
- 1/2 teaspoon garlic powder
- 1/2 teaspoon onion powder
- 3/4 cup Italian style bread crumbs
- olive oil
Instructions
- Preheat the air fryer according to the manufacturer’s instructions. Place a wire cooking rack over a baking sheet.
- Slice the cod fillets into two, resembling fish sticks. Pat each piece dry with a paper towel.
- In one shallow bowl, whisk the eggs. In a second shallow bowl, add the flour. In a third bowl, combine the breadcrumbs with the paprika, salt, garlic powder, and onion powder.
- Working one piece at a time, dredge the cod in flour to coat, then dip into the egg, and finally coat in the seasoned breadcrumb mixture. Place each coated piece on the wire rack. Repeat until all fish sticks are breaded.
- Lightly brush or spray the air fryer basket with cooking oil. Arrange fish sticks in the basket in a single layer, leaving space between each piece. Brush or spray the tops lightly with oil.
- Air fry at 400°F for 6 minutes, flip, then cook for an additional 4–5 minutes, or until the fish is golden, crispy, and reaches an internal temperature of 145°F. Cook in batches if needed to avoid overcrowding.
Nutrition Facts
Calories
455.52Fat
6.45 gSat. Fat
1.75 gCarbs
52.95 gFiber
2.83 gNet carbs
50.12 gSugar
2.02 gProtein
43.11 gSodium
928.79 mgCholesterol
197.4 mgHot Eats and Cool Reads is not responsible for the outcome of any recipe you try from this blog/website. You may not always have the same results due to variations in ingredients, humidity, altitude, cooking temperatures, typos, errors, omissions, or individual cooking abilities.
You are solely responsible for ensuring that any nutritional information provided is accurate, complete, and useful. I am not a certified nutritionist and make no claims to the contrary. Each individual's dietary needs and restrictions are unique to the individual.
Looking for more recipes, books, food and travel fun? Follow me!
Subscribe by Email, Facebook, Pinterest, Instagram, and Facebook Recipe Group!


That looks soooo good
ReplyDeleteIn our home we eat Talapia quite a bit, so the more variety the better. Thanks for increasing my repertoire of fish dishes! I just popped over from the Marvelous Monday Linkey. I would love it if you dropped by for a visit at http://www.kneadedcreations.com . Happy Day to you! Deb @ Kneaded Creations
ReplyDeleteThis looks great! Thanks for sharing at Share Your Stuff Tuesdays!
ReplyDeleteThanks so much Emily!! :)
Delete