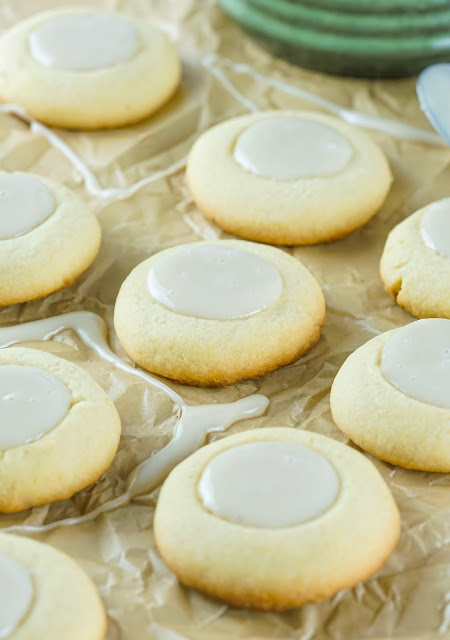
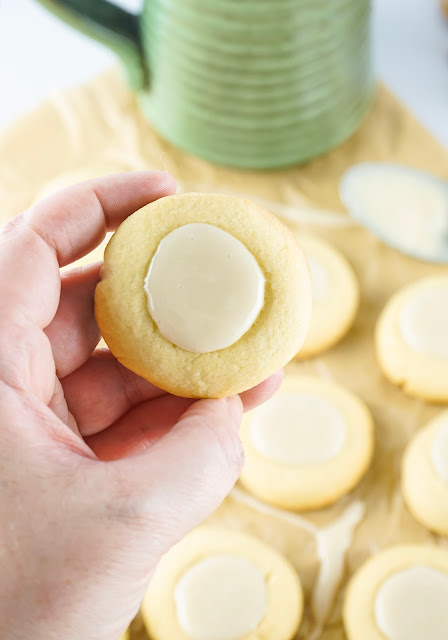
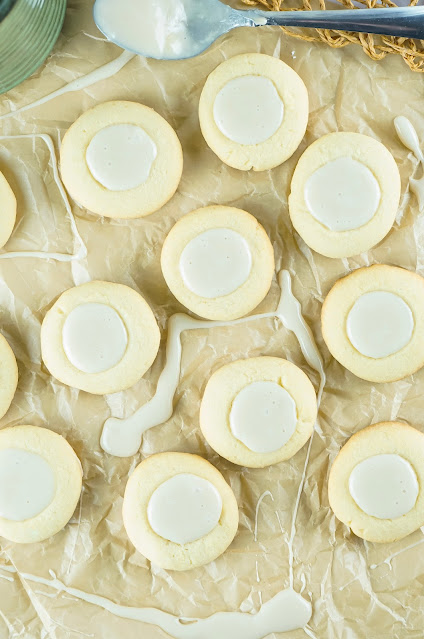
These Maple Thumbprint Sugar Cookies are such a tasty sweet treat for the holidays! The cookies and icing are easy to make and everyone loves them!
This post contains Amazon Affiliate links. Hot Eats and Cool Reads may receive a small commission for Amazon purchases made through these links at no cost to you. Thanks for your support!
Looking for more recipes, books, food and travel fun? Follow me!
Facebook, Pinterest, Instagram, Twitter, and Facebook Recipe Group!
Check out my kids recipes, crafts and activities at my other website, Sweet Hazel Honey!
CLICK TO PIN THIS RECIPE FOR LATER
If you're a maple lover like I am, then these cookies are for you! Maple is such a comforting flavor to me. It reminds me of breakfast on cool fall and winter mornings or these yummy maple candies from my childhood.
They're simple to make, sweet and such a perfect cookie for fall, Thanksgiving or Christmas. If you have a bake sale coming up, they're great for that too since they're so unique.
The dough is a maple flavored sugar sugar cookie and the icing is maple flavored as well. They bake up quick and after they're cooled, you can fill the thumbprint impression with the yummy icing.
The edges are slightly crisp, and the center is soft. The icing is the perfect touch.
Anytime we make these cookies, they disappear so fast! They are truly the ultimate fall cookie!
Keep scrolling for tips, process photos, additional holiday cookie recipes and more!
Thanks so much for supporting a small business and visiting our family owned blog 💕
What are the ingredients in this recipe?
- unsalted butter
- granulated sugar
- egg yolks
- maple extract
- salt
- all purpose flour
- powdered sugar
- maple syrup
- water
How to make:
Scroll down to the printable recipe card for measurements and instructions!
Recipe tips:
- Don’t overfill the thumbprint impressions. The icing will settle on its own and may look like more than you realize when filling.
- Use a toothpick to adjust the icing into place, if need be. I used it to ensure the edges were all filled in to get that pretty and perfect circle.
- If you don’t want to use your thumb, you can use a ¼ teaspoon (the back of it) to make the impressions in the dough.
- If you want larger cookies, but be sure to adjust the baking time. These cookies are about 2 inches in size.
- Be sure to make your impression deep enough as it will rise just a touch during the baking process and might disappear if made too shallow.
- Make sure to use real maple syrup and not pancake syrup.
- If you don't have piping bags, you can use a ziploc bag and snip off the corner.
More holiday cookie recipes you might like:
- Icebox Slice and Bake Peppermint White Chocolate Chip Cookies
- Amazing Ginger Cookies
- Brown Sugar and Cinnamon Cookies
- Pecan Snowballs
- Chocolate Kiss Cookies
- Eggnog Cookies
You can add or substitute with these ingredients:
- sprinkle chopped nuts on top if the icing
- use vanilla extract in the dough instead of maple
- skip making the thumbprint and drizzle the icing over top instead
CLICK TO SHARE THIS RECIPE ON FACEBOOK
Our favorite kitchen supplies used with this recipe:
- CopperKitchen Original Cookie Sheet & Roasting Tray Set
- Precut Parchment Paper Sheets
- Hamilton Beach 6-Speed Electric Hand Mixer with Whisk
- OXO Good Grips 7-Piece Nesting Measuring Beaker Set
- Riccle Disposable Piping Bags
I hope you enjoy this recipe as much as we did!
CLICK TO PIN THIS RECIPE FOR LATER

Maple Thumbprint Cookies
Ingredients
- 2 sticks unsalted butter (1 cup, room temperature)
- ⅔ cup granulated sugar
- 2 egg yolks
- 1 tablespoon maple extract
- 1 teaspoon salt
- 2 cups all purpose flour
- 2 cups powdered sugar
- ¼ cup maple syrup
- 2-4 tablespoons water
Instructions
- Preheat the oven to 350 degrees F and line a baking sheet with parchment paper.
- Using a hand mixer, cream together the butter and sugar until nice and fluffy (about 1-2 minutes).
- Add the egg yolks, extract, and salt and beat the mixture again for about another 30 seconds or until fully combined.
- Add in the flour and beat the mixture until it turns to big crumbs. Switch to your hands at this point and knead together the mixture until it’s easily rolled into a ball.
- Take about a tablespoon worth of dough and roll it into a ball. Place the balls on the prepared baking sheet, half an inch apart.
- Using your thumb, make a deep impression in the middle of each ball.
- Bake for 10 minutes or until very lightly browned on the bottom.
- Remove the cookies from the oven and let them fully cool.
- In a medium bowl, combine the powdered sugar, syrup, and 2 tablespoons of water. Mix well. It will be thick. If it’s too thick to stir, add a bit more water until you can stir it with little resistance.
- Place the icing in a piping bag and use scissors to snip a small tip off the end of the bag.
- Fill in each cookie impression with the icing by starting in the middle and filling in the edges with a circular motion.
- Allow the cookies to sit for a few minutes so the icing can dry or eat right away.
Notes
Don’t overfill the impressions. The icing will settle on its own and may look like more than you realize when filling.
Use a toothpick to adjust the icing into place, if need be. I used it to ensure the edges were all filled in to get that pretty and perfect circle.
If you don’t want to use your thumb, you can use a ¼ teaspoon (the back of it) to make the impressions in the dough.
If you want larger cookies, but be sure to adjust the baking time. These cookies are about 2 inches in size.
Be sure to make your impression deep enough as it will rise just a touch during the baking process and might disappear if made too shallow.
Make sure to use real maple syrup and not pancake syrup.
If you don't have piping bags, you can use a ziploc bag and snip off the corner.
Nutrition Facts
Calories
119.74Fat
5.43Sat. Fat
3.33Carbs
17.19Fiber
0.19Net carbs
17Sugar
11.59Protein
0.93Sodium
66.34Cholesterol
24.3Hot Eats and Cool Reads is not responsible for the outcome of any recipe you try from this blog/website. You may not always have the same results I do due to variations in ingredients, humidity, altitude, cooking temperatures, typos, errors, omissions, or individual cooking abilities.
You are solely responsible for ensuring that any nutritional information provided is accurate, complete, and useful. I am not a certified nutritionist and make no claims to the contrary. Each individual's dietary needs and restrictions are unique to the individual.
Thanks so much for stopping by!
Recipes around this time in blog history....
One year ago:
Two years ago:
Three years ago:
Four years ago:
Five years ago:
Six years ago:
Seven years ago:
Eight years ago:
Nine years ago:
Eleven years ago:
Looking for more recipes, books, food and travel fun? Follow me!
Facebook, Pinterest, Instagram, Twitter, and Facebook Recipe Group


Comments
Post a Comment
Comments make my day! Comment moderation is enabled, so if you don't see your comment right away, check back later after I approve it! :) Thanks so much for stopping by!